How to Bleed Brakes: 10-Step Ultimate DIY Guide

jkram200 • February 20, 2026

If your brake pedal feels soft or sinks to the floor, bleeding the brakes is the fix, and yes, you can do it at home with the right steps and patience.


Bleeding your brakes removes trapped air from the hydraulic system so the pedal feels firm again and the car stops safely. 

You probably noticed the signs already. Soft pedal, or the car takes longer to stop. Maybe you changed pads, and now the brake feels spongy. You start wondering, did I mess something up, or is this normal? Good news. It’s common. And yes, you can fix it yourself.


This guide walks you through the full thought process, not just the steps. By the end, you’ll know when to DIY and when to call a shop.

Why Bleeding Brakes Is Important


Bleeding brakes keeps the pedal firm and the car stopping the way it was designed to. The braking system works on hydraulic pressure. Fluid transfers force instantly, but air compresses. When air enters the lines, part of your pedal effort gets absorbed instead of reaching the wheels. That’s why the pedal feels soft and the car takes longer to stop.


At first it seems minor. You just press harder. But in a sudden stop, that extra travel becomes dangerous. Heat makes it worse because trapped air expands. A brake that feels normal in the driveway can fade on a long downhill.


It also protects the system over time. Old fluid collects moisture, lowers boiling point, and creates vapor bubbles. Regular bleeding refreshes fluid and prevents wear in calipers and ABS parts.


In simple terms, bleeding brakes:


  • Restores solid pedal feel
  • Reduces stopping distance
  • Prevents heat fade
  • Extends brake component life


So it’s not just fixing a soft pedal. It’s making sure the car reacts instantly when you need it most.


Why You Need to Learn How to Bleed Brakes First

Auto technician pointing at a car’s brake system while explaining repairs to a customer

Brake systems work on pressure. When you press the pedal, fluid transfers force directly to the calipers. Fluids cannot compress, but air can. That’s the whole problem.


If air enters the lines, the pedal sinks before pressure builds. Think of squeezing a sponge instead of a solid block.


These are some common ways air sneaks in:

  • Replacing brake pads or calipers
  • Opening brake lines
  • Old contaminated fluid
  • Running the reservoir empty
  • Overheated brakes on steep hills


Many people panic and replace parts like pads, rotors, and even the master cylinder. Money goes, but the problem is still there. Ninety percent of the time, the fix is simply removing air.


Brake fluid also absorbs water over time. That lowers its boiling point. Hard stops can then cause vapor bubbles. And now you have air again. So yes, bleeding is not just about pedal feel. It’s about safety.


If you are unsure about your brake condition, a certified technician at Hamilton Tire can inspect your system. We offer brake inspections and brake repair services, among many other automotive services.


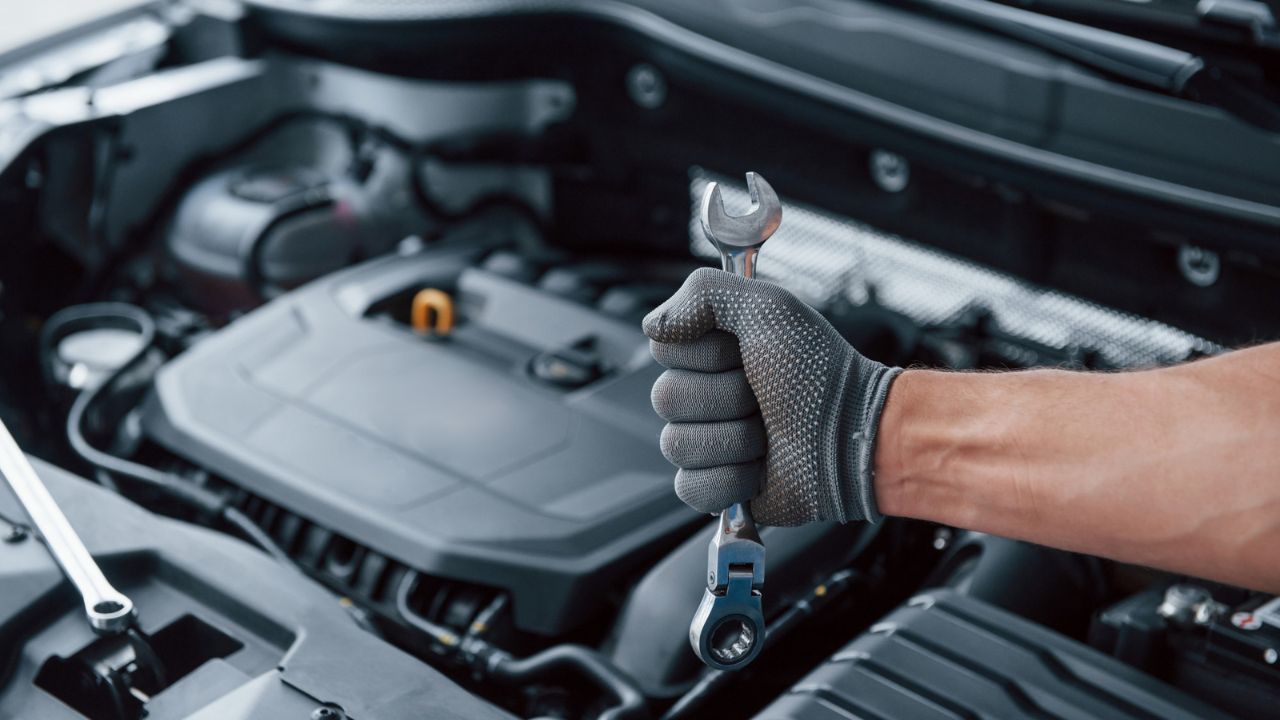
Tools You Need Before Starting


Preparation saves frustration. The job itself is simple. Running back and forth to find tools is what ruins it. You do not need a full shop, but you do need the basics.


You need:

  • Fresh brake fluid (DOT type from your manual)
  • Brake fluid container
  • Box wrench (usually 8mm or 10mm)
  • Brake wrench
  • Brake cleaner
  • Clear plastic hose
  • Jack and stands
  • Gloves and rags
  • Towel
  • Helper or one-way bleeder kit


Tip: Never reuse old fluid. Brake fluid absorbs moisture from the air like rice absorbs water. Once opened, its lifespan is short.


The 10-Step Method: How to Bleed Brakes Safely


If you are alone and are wondering how to bleed brakes, here’s how you can do it


Step 1: Park Level and Secure the Car


Park on flat ground. Engage the parking brake and chock the wheels. You don’t want a rolling car while under it. Then, loosen lug nuts slightly. Do this before lifting the car. Just crack them loose.

Once done, support the car on jack stands. Never rely on a jack alone. Remove the wheels to access the bleeder valves.


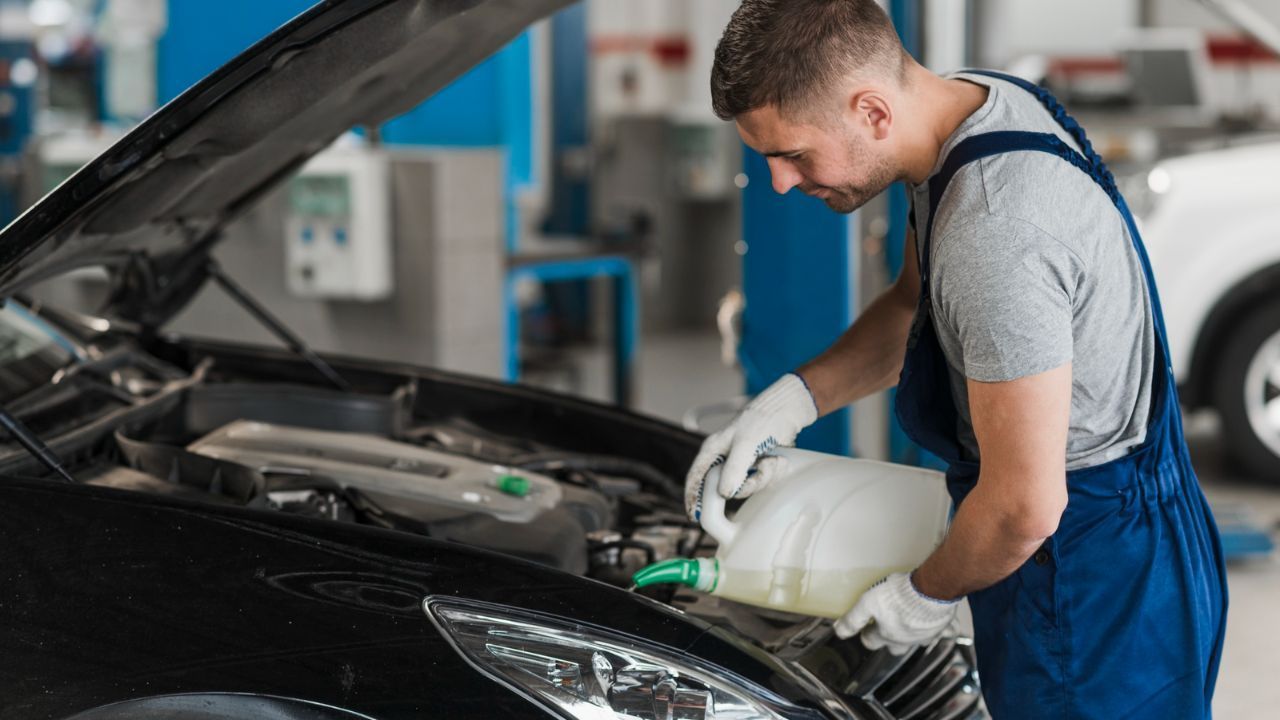
Step 2: Remove the Old Brake Fluid


Open the hood, and locate the brake fluid reservoir. Once located, remove the old brake fluid. During the process, never let it run dry. 


Step 3: Start With the Correct Wheel Order


To bleed the wheel, always begin with the wheel farthest from the master cylinder.

  • Rear passenger
  • Rear driver
  • Front passenger
  • Front driver

That means you move from the farthest wheel from the master cylinder to the closest. Check your vehicle manual if unsure.


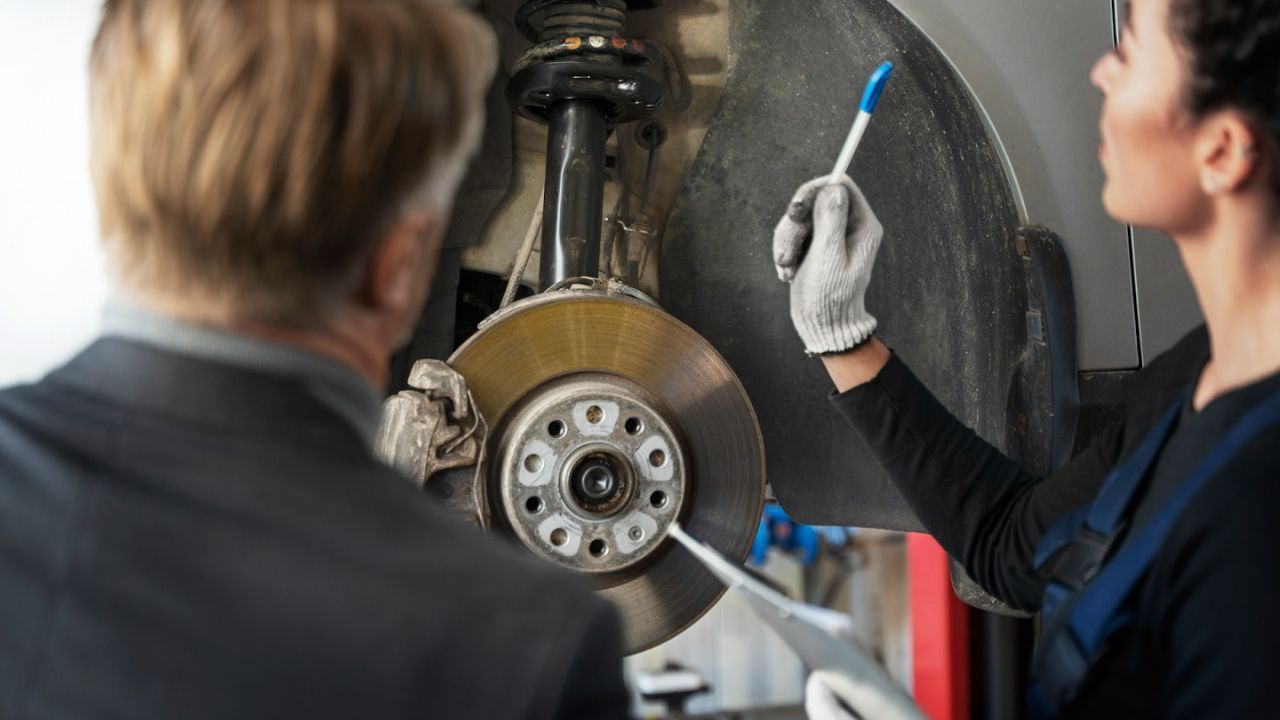
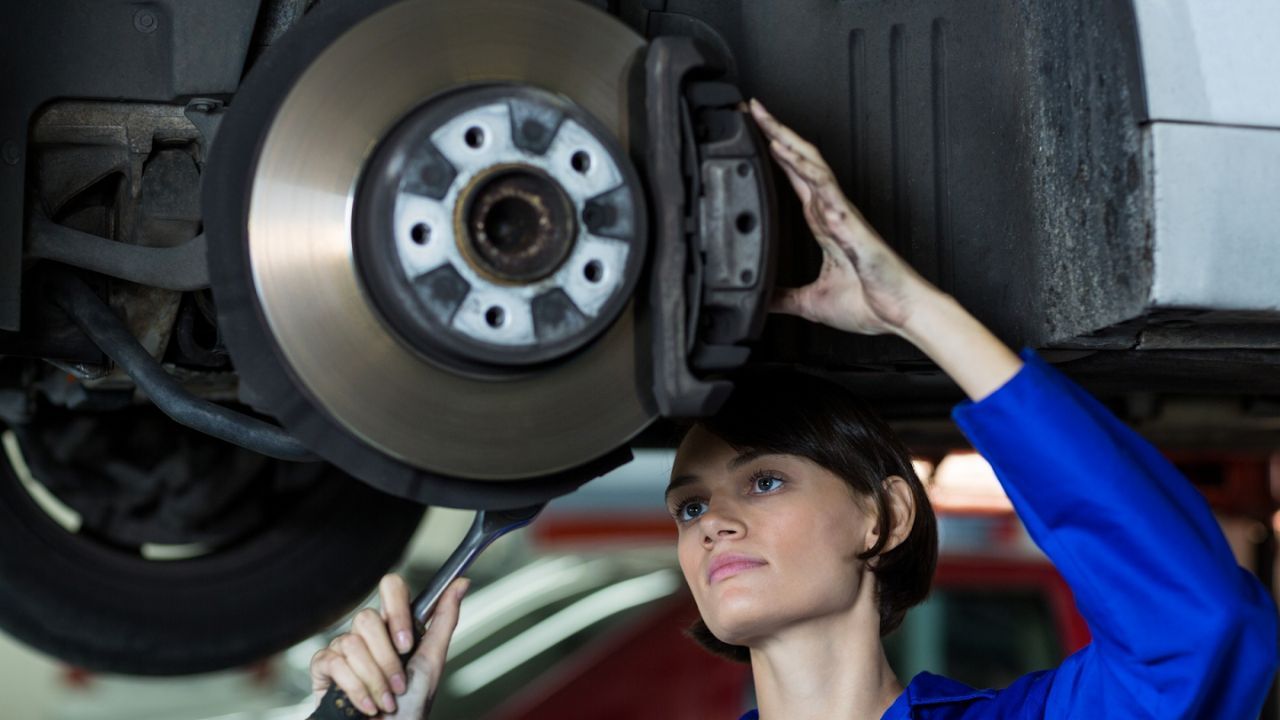
Step 4: Find the Brake Bleeder Valve


Locate the brake bleeder valve. It looks like a small screw with a tiny hole in the center. On disc brake systems, you’ll usually find it at the top of the brake caliper. 


On drum brakes, it’s typically positioned near the top center on the back side of the brake assembly, behind the wheel area.


Step 5: Attach Hose to Bleeder Valve


Push the clear hose onto the bleeder screw. Place the other end in a jar partially filled with brake fluid. This prevents air from going backward.


Step 6: Open the Bleeder Screw


Loosen the bleeder valve with the correct brake bleeder wrench, then begin removing the old fluid using your vacuum pump. 


If you’re using an air-powered pump, connect it to your compressed air source first, then squeeze the trigger to start pulling fluid through the line. With a manual pump, use steady, repeated squeezes until the fluid flows smoothly.


As you work, stay organized and pay attention to these key points:


  • Collect the old fluid in a plastic container or reservoir.
  • Monitor the master cylinder under the hood so it never runs dry.
  • Refill with fresh brake fluid as needed during the process.
  • Watch the clear hose for bubbles and dark fluid at the start.
  • Continue bleeding until the fluid runs clean and bubble-free.

When the bubbles disappear, and the fluid looks clear, most of the trapped air and old brake fluid have been flushed from the system.


Step 7: Repeat Until No Bubbles Appear


You’ll see foam at first. Then tiny bubbles. Then, clear fluid. That’s your moment. Move to the next wheel and keep repeating the same process.


Step 8: Fill the Master Cylinder to the Max


Fill the master cylinder with fresh brake fluid up to the “Full” or “Max” line, then securely reinstall the cap. Make sure no dirt, dust, or debris gets into the reservoir while it’s open.


Step 9: Tighten and Reinstall


Close all the bleeder valves and tighten them firmly. Then, reinstall the wheels, hand-tighten the lug nuts, and lower the car safely back to the ground. Once it’s down, tighten the lug nuts fully to the proper torque specification.


Step 10: Test Pedal Before Driving


Press the brake firmly with the engine off. Then start the engine. The pedal should feel solid and stop halfway. If still soft, repeat once more.


Tips That Manuals Don’t Tell You

Auto mechanic inspecting a car’s brake rotor and caliper in a repair shop

There are a few things that you can know only when you experience something. While we at Hamilton Tires and Car Care Centre started bleeding brakes, we faced a few issues when we did things the wrong way.


Here’s what you should keep in mind:


  • Slow pedal movement prevents foam formation
  • Tap the caliper lightly to free trapped bubbles
  • Use a clear hose so you can actually see progress
  • Replace fluid every 2 years, even if it looks clean
  • Never mix DOT 3, 4, and 5 unless approved


Mistakes That Cost Money


People don’t damage brakes by doing the job. They damage them by rushing the job. Whenever you’re planning to bleed the brakes, do it when you have enough time. While doing it, make sure to avoid these mistakes:


  • Opening the bleeder too wide
  • Letting the helper release the pedal early
  • Using the wrong fluid type
  • Reusing drained fluid
  • Skipping wheel order


If something still feels wrong after two attempts, that’s your cue to stop. A professional inspection prevents real danger.


When It’s Smarter to Call a Mechanic


There’s a line between DIY and risk. If you notice any of these, step back:


  • Fluid leaks on the inner tire
  • Brake warning light stays on
  • Pedal sinks while holding pressure
  • Uneven braking left to right

That usually means seals, lines, or ABS issues. Not a simple air problem.


Shops perform full brake diagnostics and system inspection before replacing parts. Sometimes they also pair it with maintenance checks like oil or alignment to ensure safe driving.


How Often Should You Bleed Brakes?


Most car makers suggest replacing brake fluid every 2 to 3 years. But ask yourself:

  • Does the fluid look dark brown?
  • Has it been more than three years?
  • Do you drive in harsh winters with lots of moisture and road salt?


If yes, a full brake fluid flush is smart.


In places with cold winters, like Ontario, moisture in brake fluid builds up faster. Road salt also accelerates corrosion. That makes regular service more important than many drivers think.


What Does a Proper Brake Pedal Feel Like?


This is a real concern people have. After bleeding, the pedal should:

  • Feel firm within the first inch or two
  • Not sink slowly under steady pressure
  • Not feel springy or bouncy


Take a slow test drive in an empty lot. Start at 10 mph. Then 20. Build trust in the system again. If something feels off, do not ignore it.


Final Thought


Most people fear brakes because they sound complicated, but they’re really just pressure and patience. The real skill isn’t turning the wrench, it’s knowing what the car is telling you through the pedal.


Bleeding brakes is not glamorous work. Your hands get dirty. Fluid stains. You may spill a little. But when you press that pedal, and it feels solid and strong, there is a quiet pride in knowing you handled something that truly matters.

transmission flush cost
By jkram200 February 20, 2026
Get clear insights into current transmission flush pricing. Learn what’s included, what raises the cost, and when it makes sense.
best all season tires
By jkram200 February 20, 2026
Find the top all-season tires worth buying this year. Practical recommendations for everyday drivers who want grip, comfort & durability on all weather roads.
causes-of-gas-leak-in-car
By jkram200 February 16, 2026
From loose gas caps to fuel line damage, here are 9 shocking reasons your car may be leaking gas and how to spot them early.
car-jumps-when-accelerating-causes-fixes
By jkram200 February 14, 2026
Car jumping when accelerating? Discover 7 common causes like spark plugs, fuel delivery, sensors, and easy fixes to restore smooth driving.
10-steps-preparing-car-for-winter
By jkram200 February 13, 2026
Use this complete winter car checklist to avoid breakdowns. Prepare tires, battery, fluids, wipers, lights, and an emergency kit in 10 steps.
check-engine-light-codes-meaning
By jkram200 January 28, 2026
This guide explains common check engine light codes, possible causes, symptoms, and whether it’s safe to keep driving your car.
windshield-wiper-replacement-guide
By jkram200 January 28, 2026
Find out when windshield wiper replacement is needed, the warning signs to watch for, and how to replace blades correctly for clean wiping.
how-to-keep-car-cool-in-summer
By jkram200 January 28, 2026
Beat brutal heat with 9 smart ways to keep your car cool in summer: shade, reflective covers, safe window cracking, AC settings, plus UV protection tips on hot days
By jkram200 January 9, 2026
From tire checks to smart packing, this checklist for road trip planning helps you avoid breakdowns and enjoy a relaxed, confident drive.
By jkram200 January 9, 2026
Car smoking but not overheating? Learn 7 common causes, warning signs, and what to do next to avoid costly engine damage.
Show More